New phone, old phone


And again the two years were over …time for a new mobile phone. Most of the mobiles that have been using were Siemens phones …and I was quite happy with them. This time I
wanted a change …why? Well have you had a look at the current Siemens? It’s a brick! Great it has great camera and stuff – but I give a f… I want it write SMS
and to call. It’s not supposed to be toy. If I want to make pictures I take real camera. …at least for now. So …no Siemens this time. So either Nokia or a
Sony-Ericsson. I was never a big fan of Nokia …plus the 6230 just looks horrible! …so I got myself a SE K700i. …for a few days and then gave it back – it is
just not my type. Seems like a lot of annoying things were removed in a new firmware version (as I heard afterwards) ….but anyway – I just did not felt right. It felt like a
step backwards from my old S55. So I took a shot and ordered the horrible looking Nokia 6230. But believe it or not – they are currently out of stock (at least at my provider)! So
my old one still has to do its job. Well, you might have heard …it seems like the S55

keyboards only last about a year. And pretty much exactly one year ago I got my phone replaced because I’ve lost a key. Thanks to Murphy you can imagine what happened – just
the day after I’ve sent back the K700i. *sigh*
Ok… since the new mobile is supposed to arrive soon I did not want to spend to much time and money fixing my old S55. So decided to replace the keyboard by myself. I ordered a
keypad at ebay (ripoff!) and though I might be of use for some people to explain how to fix the S55 keyboard.
First off: make sure you got the right tools (got I hate not having the right tools!).You need a torx 5 screwdriver and a flat gripper.

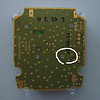
That’s it. Remove the battery. You’ll see 4 little screws. Remove them and carefully lift the front case. The keyboard is on a circuit board. But the board will come off
immediatly. It’s just connected through some contacts. If you only got a keypad and not a full original keyboard with circuit board attached then now comes the hard part.
You need to remove the rest of the keys. But be careful not to destroy the board. I’ve been using just my hand to gently rip off the keys. Unfortunately the real mounting did not
come off that easily. Carefull use the gripper to remove it on the front side.

Break away the rest of the mounting and then extrude the little knobs from the front through the back. Then just put keypad onto the front and close the casing.
And voila! Almost as good as new. The lighting is a bit cheap but the keys are still working fine. At least it will work until I finally get the new one.


